How To Change the Battery in My Sportdog® 825X Remote
Before You Begin
If you also need to replace the rubber cover, do it while you change the battery, since both require opening the remote. For steps, visit How To Change the Rubber Cover on My SportDOG® 825X Remote.
How To Change Your Remote’s Battery
Remove the back cover. Use a #1 Phillips screwdriver to remove the screws and back cover.
(If you purchased a battery replacement kit from our website, a screwdriver is provided.)
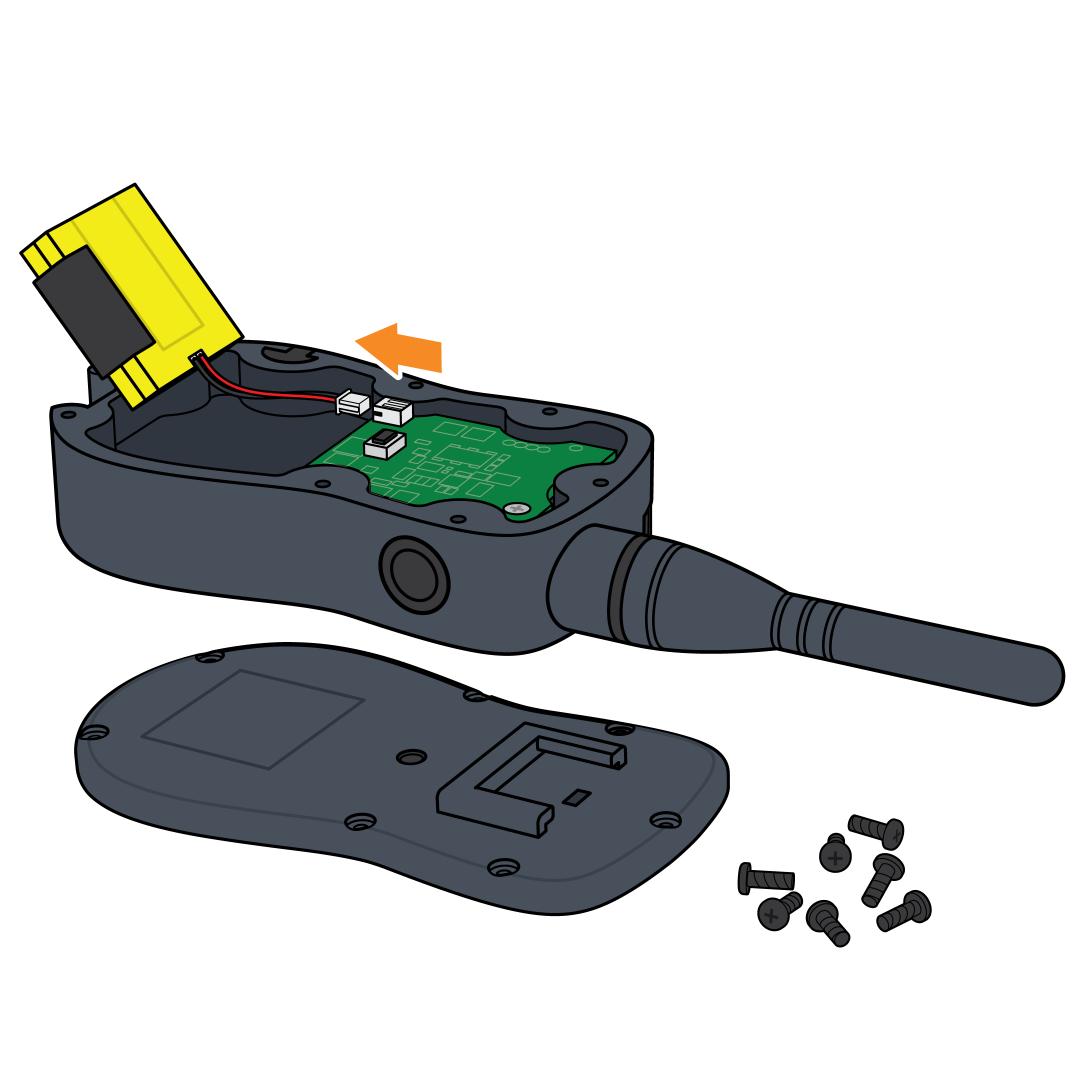
Disconnect the old battery. Pinch the wires and press against the back of the remote for support, then pull the wire plug out of the connector. If it doesn’t come out at first, pull firmly.
Install the new battery. Insert the new battery’s wire plug into the connector, then place the battery into the back of the remote.
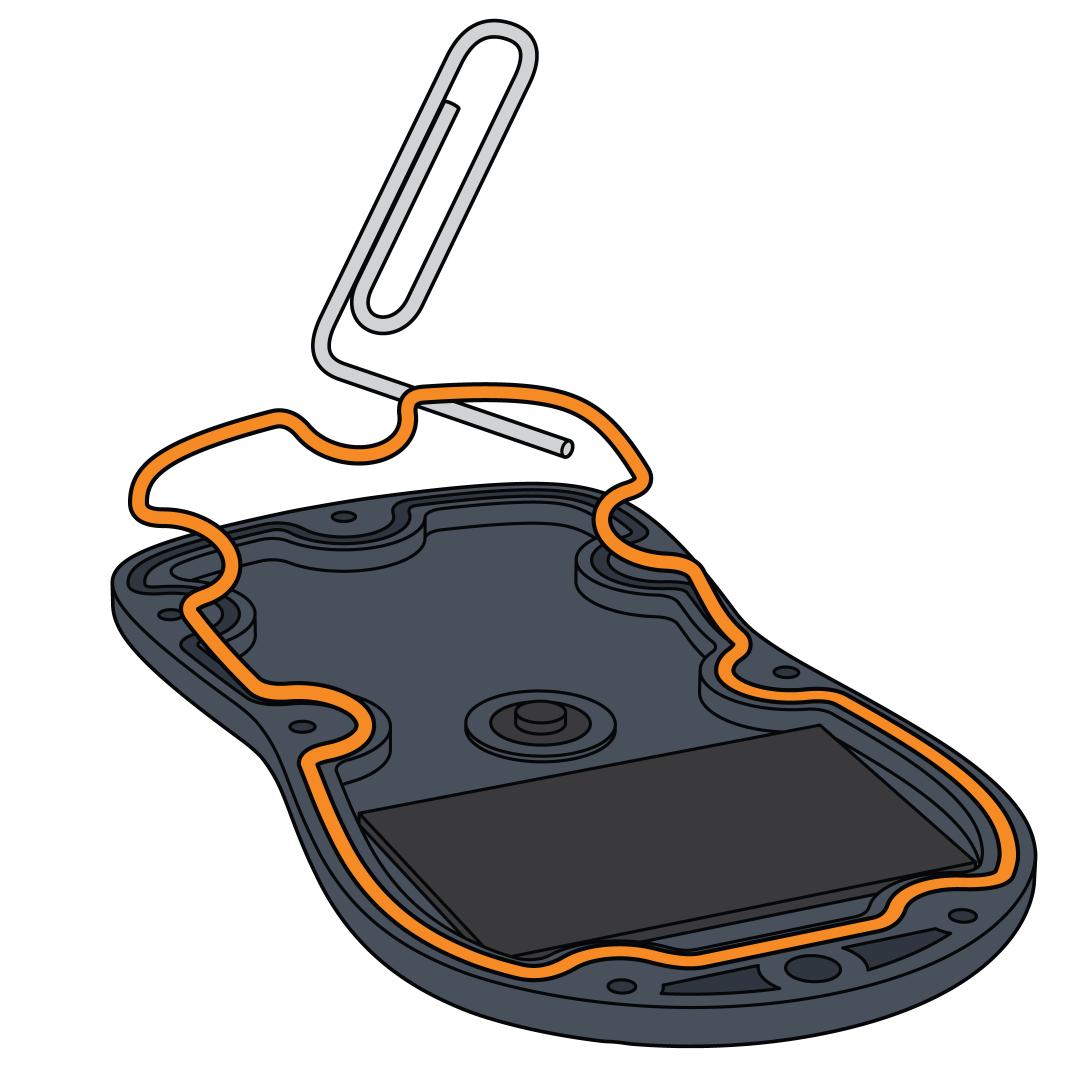
Remove the rubber gasket. Use a paperclip or similar tool to remove the rubber gasket from the battery cover. Wipe out any dirt or debris.
Install the new gasket. Install the new gasket from your battery replacement kit. This keeps the remote waterproof.
Reassemble the remote. Align the front and back covers and tighten all 8 screws. Do not overtighten, as this can damage the remote.
Pair the remote and collar. After replacing the battery, pair the remote and collar. For pairing steps, visit How To Pair a Collar to My SportDOG® 825X.
Get The Most Out of Your New Battery
- Charge only the component that has a low battery. The remote will indicate a low battery by glowing a red light when any button is pressed.
- For long-term storage: Charge units once every 3 to 4 months when storing for long periods of time.
- For more information: Visit How To Get the Most Battery Life From My SportDOG® 825X.